Note: the following lesson is written in a manner to help provide understanding to a general user. This is neither a scientific nor technical document. More scientifically detailed understanding can be found in the following papers and additional publications:
Looking beyond fibrillar features to scale gecko like adhesion MD Bartlett, AB Croll, DR King, BM Paret, DJ Irschick, AJ Crosby Advanced Materials 24 (8), 1078-1083
High capacity, easy release adhesives from renewable materials
MD Bartlett, AJ Crosby
Advanced materials 26 (21), 3405-3409
Designing Bio Inspired Adhesives for Shear Loading: From Simple Structures to Complex Patterns
MD Bartlett, AB Croll, AJ Crosby
Advanced Functional Materials 22 (23), 4985-4992
Scaling normal adhesion force capacity with a generalized parameter
MD Bartlett, AJ Crosby
Langmuir 29 (35), 11022-11027
Lesson #3: Griphook Hanging Configurations
Click Here for a downloadable PDF version of this lesson.
Summary
● A single Griphook can hold up to 3 lbs.
● There are configurations of more than one Griphook that will permit us to hold more weight than 3 lbs.
● The materials we use to link the Griphooks will affect the configuration’s total load capacity; stiffer connecting materials will have a higher load capacity
Introduction
The Griphook is the Geckskin technology’s flagship product. It possesses all four of the performance parameters the Geckskin technology is capable of bringing to market: load-bearing, reusable, non-damaging on multiple surfaces. Currently the maximum weight a Griphook can hold is 3 lbs. This lesson will explain how to use more than one Griphook to hold heavier objects.
At Felsuma, we think about Geckskin devices as performing a job, solving a problem. Our real specialty is temporary jobs**. To optimize use of a Geckskin device means to use it for temporary applications. Sure a Griphook will stay in one place “forever” if you use it properly but if that’s what you want, why use a Griphook? A Geckskin product offers the unique utility of use for an hour (and again the next hour), a day (and again the next day), a month (and again the next month), a year (and again the next year), to hold something on your wall, window, bathroom tile, door, without fear of damage. So this lesson offers some insights into how you can configure Griphooks to perform a job for you, when you need to hold more than three pounds.
**In traditional day to day wall-mounting applications, one doesn’t tend to use more than one wall mounting product to hold more weight; we buy a bigger or stronger wall mounting product. For example if a nail is not sufficient to hold an object on a wall, we’ll perhaps buy a molly bolt. In the market are many different sizes, shapes and types of wall mounting products (nails, screws, tapes, glues) to accommodate different weights, surfaces, environments, etc. Take note however, there’s one huge embedded assumption in all of those solutions (for the most part) and that is that they will remain if not permanently then indefinitely in place OR if removed, will damage. We’re asking those devices to hold for as long as we need them to hold, however long that may be. Given that expectation it makes sense that we’d have such a variety of products to hold greater weights on different surfaces to meet those indefinite needs.
If each Griphook holds 3 lbs., consider the two horizontal configurations below.

Figure 1: Griphooks in a horizontal, parallel configuration - object held with a string

Figure 2: Griphooks in a horizontal, parallel configuration - object held with a metal bar and S hook
To the casual observer, the two configurations may appear both to have a total load capacity of 6 lbs. That is not the case. In our world of Think Like Geckskin™ , this is where the insight of “gecko anatomy meets mathematics” by our Sci Fos (scientific founders) at the University of Massachusetts Amherst plays a role in the entire configuration’s strength.
Remember, Geckskin is a technology, not a material. The idea of the Geckskin technology is that it’s a bio-inspired system, a construct comprising the animal’s pad, skin, tendon, bone working together to grip, peel and distribute the load of the animal’s body. All the parts working together are what permit a gecko to walk up walls. Specifically, the gecko’s tendon is made of a stiff material; that stiff tendon is what permits scalability in gecko size. The Sci Fos asked, “how can a 1 gm gecko and a 300 gm gecko both climb a wall when the latter animal is not 300x larger than the former?” The Sci Fos observed this and it formed the basis of their invention. From that observation, one of the most important insights by our Sci Fos was that the stiffness of the materials used in the entire Geckskin device determines its strength. One cannot point just to one anatomical component, say, the Pad, in a Geckskin device, to measure the device’s load-bearing limit. The entire device’s structure determines its capacity to hold weight. Stiffness is one of the most important variables to determine a given device’s load capacity. This Think Like Geckskin™ principle extends to the entire configuration; it does not end with the device. Therefore, in the above Picture 1 and Picture 2 the string and bar (and S Hook) respectively are included in the calculation of the entire configuration’s load-bearing strength. The following equation that the Sci Fos use to describe the Geckskin technology sheds light on this stiffness principle.

Equation 1
Where
Fc = load capacity (of the device)
Gc = Van der Waals forces (a constant in this equation!)
A = Area
C = Compliance
In Equation 1, please take note: C (compliance) is in the denominator. So as C decreases, Fc increases. Said another way, as the device stiffness increases (compliance goes down), the device can hold more weight.
I know, counter-intuitive, isn’t it? It’s one of the many marvels of the Geckskin technology. In Picture 1 above, the string is less stiff than the Griphooks. Therefore, the entire configuration’s strength is less than 6 lbs.
However, the bar and S hook are stiffer than the griphook so that we do have the full 6 lbs. of load capacity.
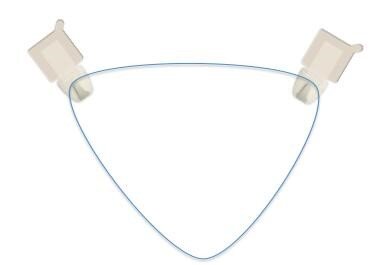
One subtle point about Picture 1 is that the Griphooks are not optimized for Peel Control™ capability because the inward force of the object will pull at the Tendons to create a peel.

Picture 2a: Lateral forces acting on the Tendons in the horizontal configuration creates loss of Peel Control™ capability
So, to address this loss of peel control, we can angle the Griphooks inward so that the Tendons are in pure shear with the object. This may require adjusting the Griphooks a couple of times depending on the length of the string (or whatever you’re using) and the weight of the object. Picture 2b depicts this new angled Griphook configuration.
Picture 2b: Griphooks in a horizontal configuration angled inward to maintain Peel Control™ capability
While angling the Griphooks will not increase the configuration’s load capacity, it will make it more effective.
Returning to the configurations discussion, the bar and S hook configuration can be used to include even more than two Griphooks to increase load capacity to 9 lbs., 12 lbs. etc.
We can also use the Griphooks in a vertical configuration.

Picture 3: Griphooks in a vertical, parallel configuration - object held with a string, wire, chain
Similar to the horizontal configuration, the stiffness of the material that connects the Griphooks (string, wire, chain) will determine the strength of the configuration. The challenge in this configuration is making sure the connecting material distributes the load evenly across both Griphooks.
Moving to a different way of thinking about hanging configurations, how might we hold a tablet (see picture below) or a skateboard, snowboard or skis or any flat object? Picture 4 shows how we might do that. In Picture 4 we use two Griphooks on the bottom to hold the tablet and one on top to steady it.

Picture 4: holding a flat object on the wall
Ending
There are many more configurations you’ll think of. The objective of this lesson is to give you ideas as to how to use multiple Griphooks to hold more than 3 lbs. (the current load capacity of a single Griphook).
6